Process
STEP 1
These traditional bench-made Windsor Chairs are constructed utilizing the methods that craftsmen
have used for more than 200 years. Each chair starts with a 2-inch thick piece of pine or white wood
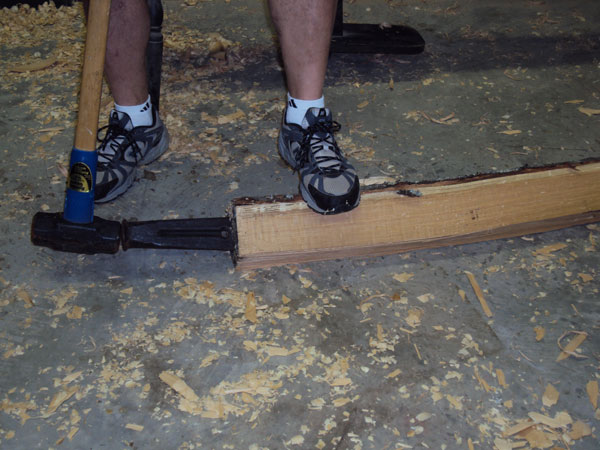
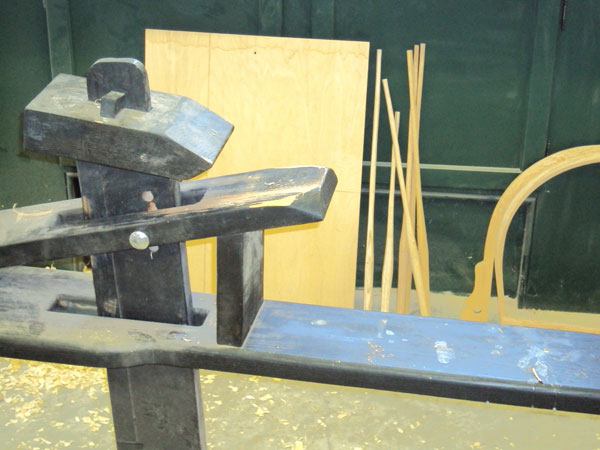
used in the seat. The bows and arm rails are rived from a log, and the legs are turned out of maple.
Being produced one at a time, each style chair has its own uniquely designed pattern/template which is
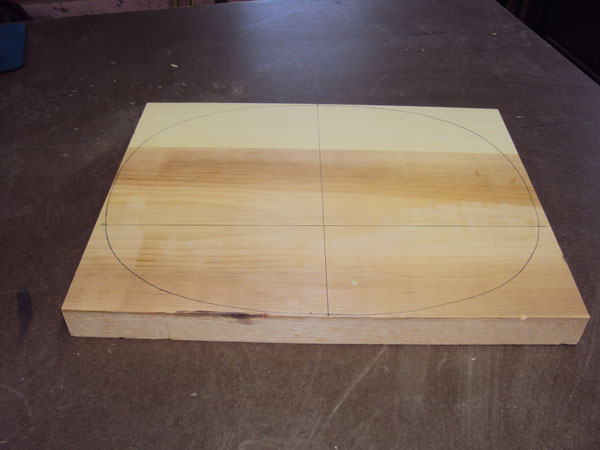
used to replicate that particular chair, over and over again. The process begins with the pattern being
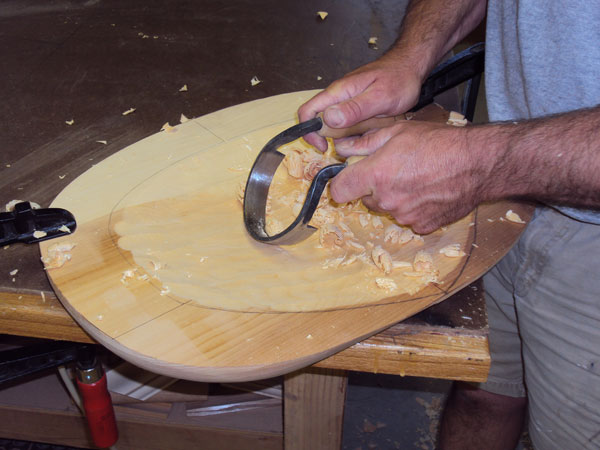
traced on the seat blank. Once the seat is sawn to shape, the saddling of the seat begins with the use
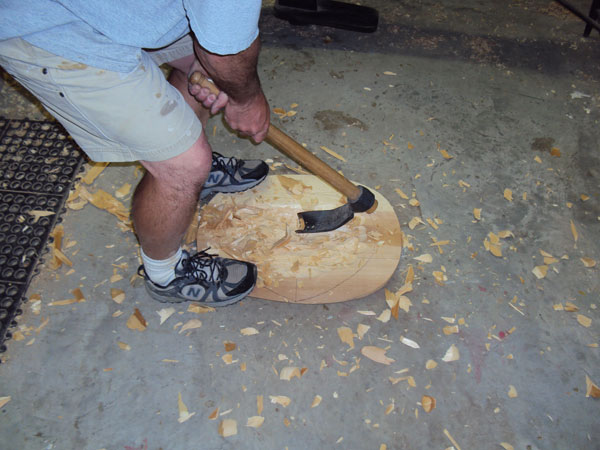
of an archaic-looking tool called an adze, which looks something like an axe with a curved blade.
Standing over the seat, the maker begins chopping away at the blank. The adze removes a lot of wood
quickly, and the maker continues this process until he feels he has removed enough wood to move onto
the next saddling tool: the scorp.
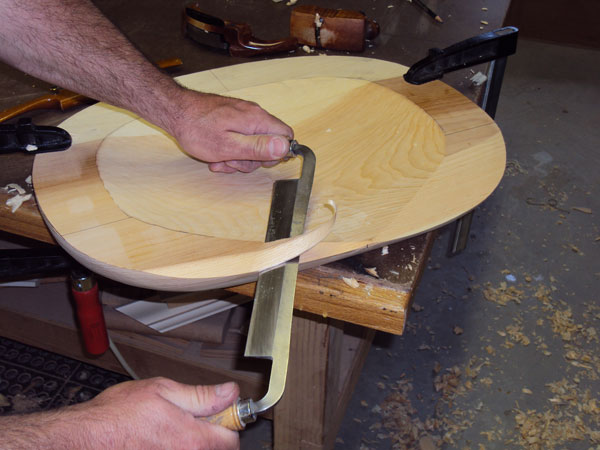
STEP 2
The scorp is a forged, curved blade with two handles. The maker clamps the seat to the bench
and begins cleaning up the marks made by the adze, bringing the seat closer to the desired depth.
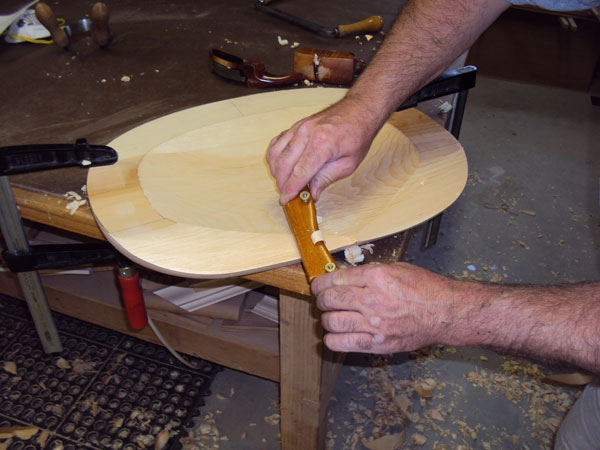
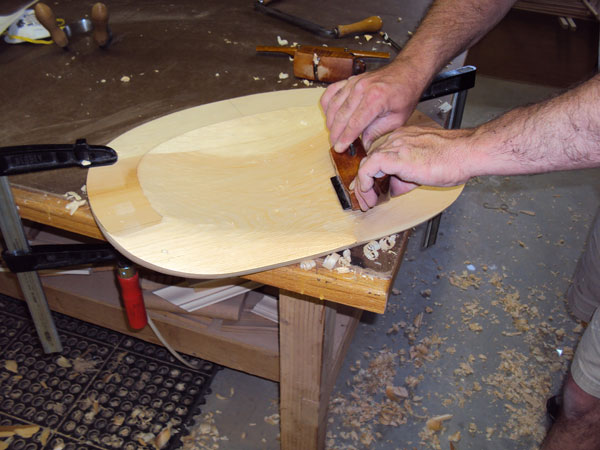
He then uses a series of tools – compass plane, drawknife travisher and spoke shave – to refine
the seat to its final shape. He checks his progress by rubbing his hand along the seat, feeling
for irregularities. He will continue to work at it until the surface is smooth and uniform.
STEP 3
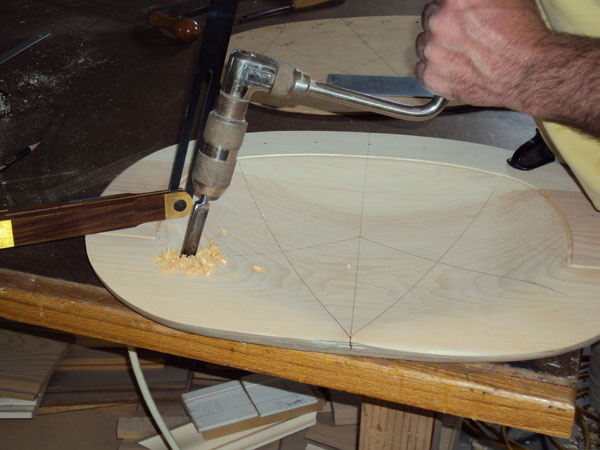
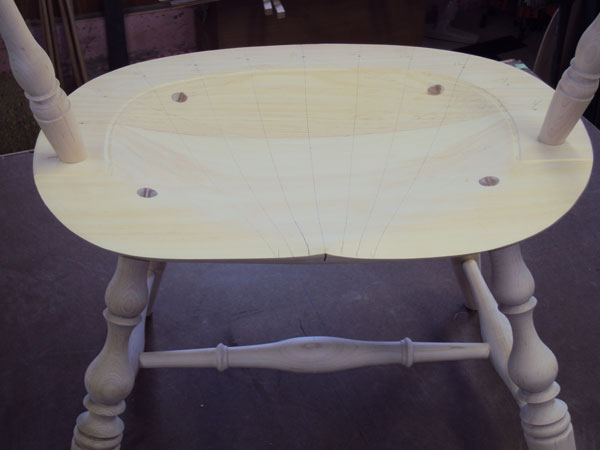
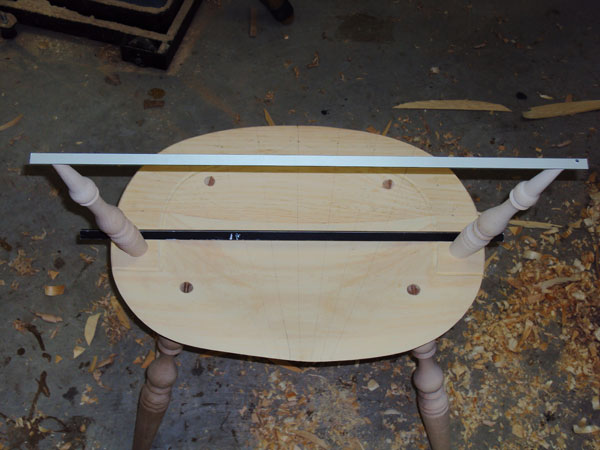
Setting the legs is next. Referring to the template, the maker strikes a series of layout lines
on the seat blank to mark the location of the legs and the angles at which they are drilled. After
carefully drilling all four legs, he uses a tapered reamer which matches the top of the legs, and
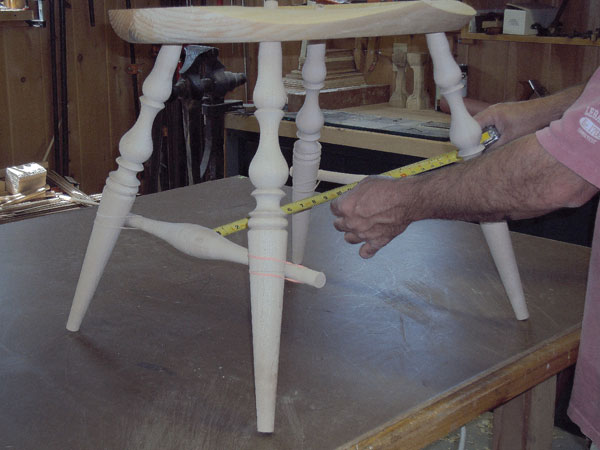
begins tweaking the hole to the exact position needed for symmetry and stability. Once all four
legs are correct, the stretcher system is measured, angles are calculated and holes are drilled
into the legs. This is a very important step in building the chair. When a person sits, most of
their weight is exerted to the undercarriage (the legs and stretchers). The chairs I build take
that into consideration. When measuring the stretchers, a certain amount of preload is added to
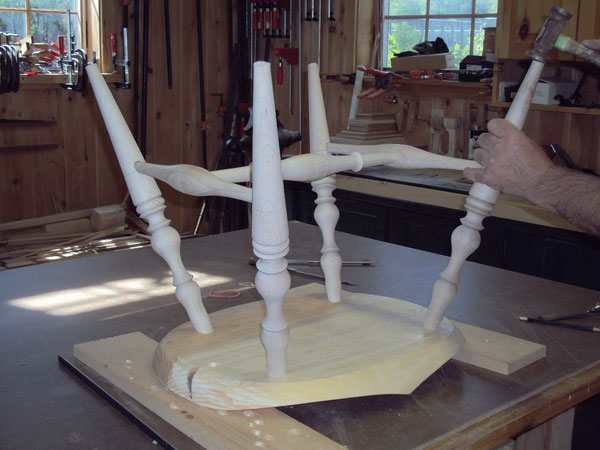
the length of the stretchers to keep the undercarriage tight for many generations. When all is
right, the undercarriage can be glued onto the seat. Glue is applied to the leg holes, and the
entire undercarriage assembly is then inserted from the bottom. The legs are tapped to seat them
firmly, and then they are wedged from the top.
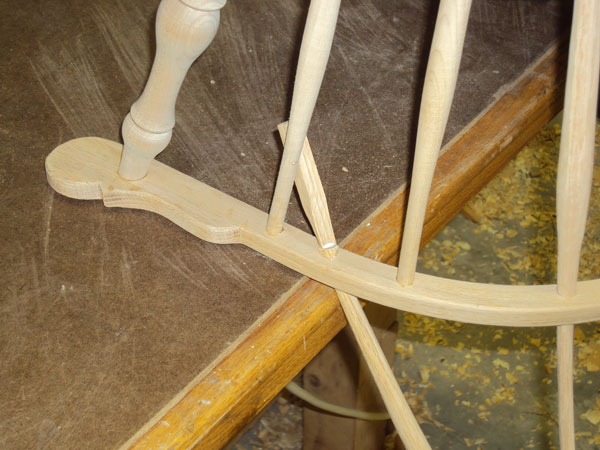
STEP 4
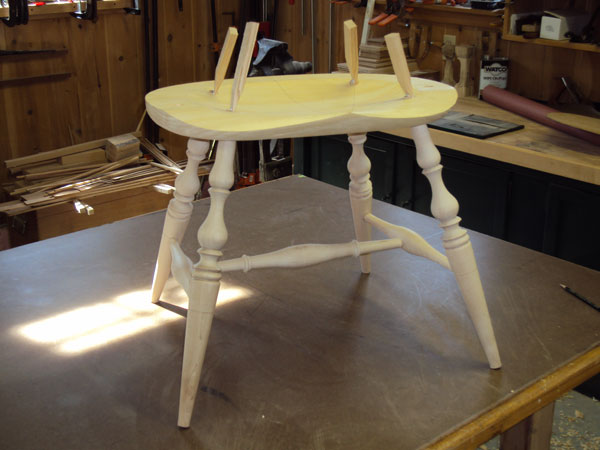
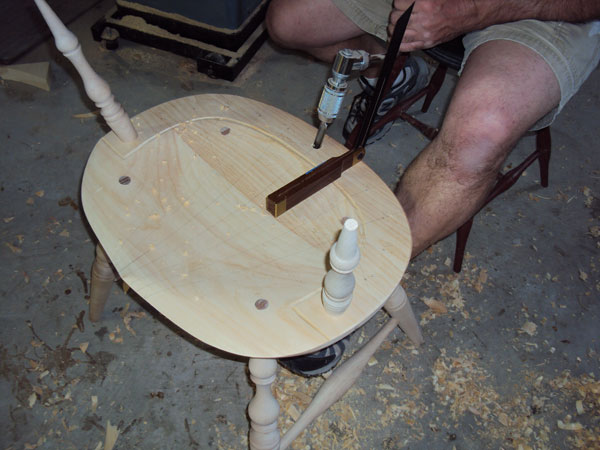
Next, the tops of the legs are trimmed flush with the seat. The chair is then leveled, and
the legs are cut to achieve the desired height. The maker then refers back to the template
to lay out the location of spindle and stump holes. These are drilled, making them ready to
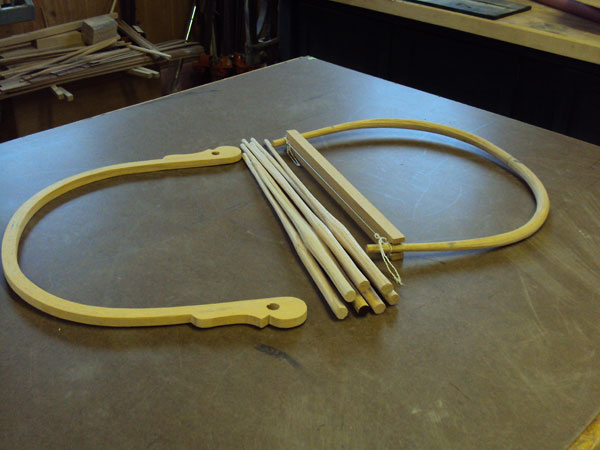
accept their corresponding parts. The maker then turns his attention to the arm rail and
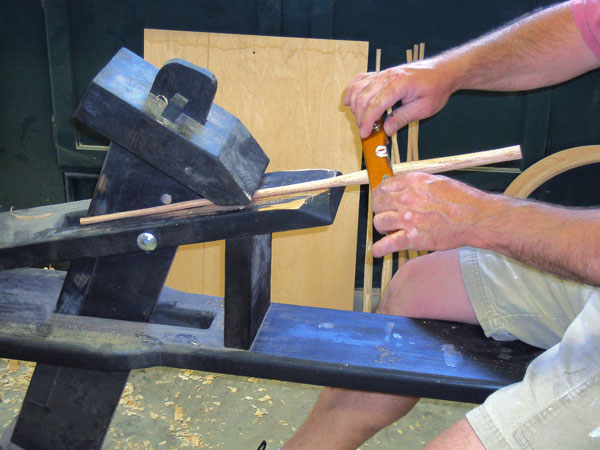
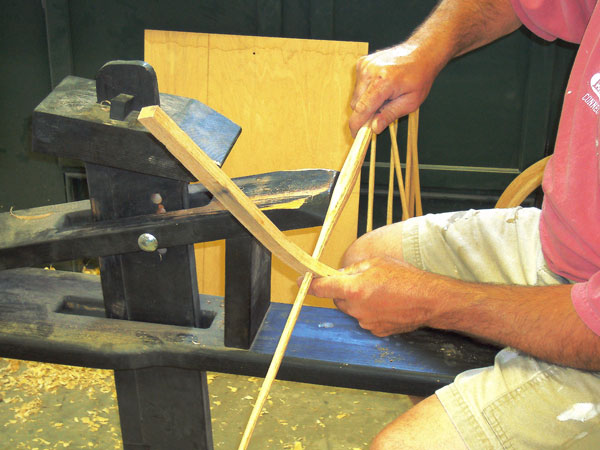
bow. These parts, along with the spindles, are usually made several days in advance because
they are rived from green wood and steam bent. They must be dry before being inserted into
the chair.
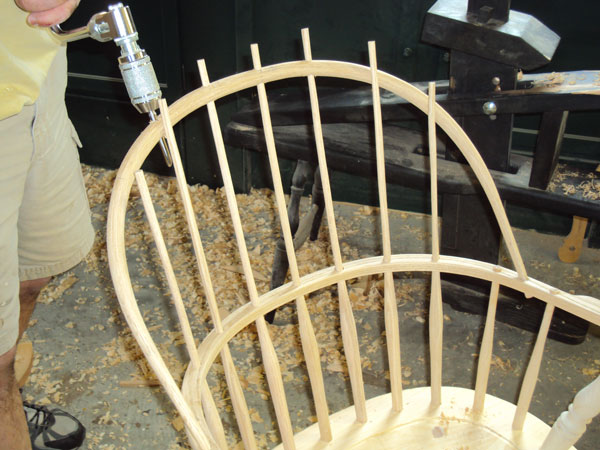
STEP 5
The arm rail, bow and spindles are now finished dimensioned and fitted to the chair.
After the holes are drilled in the arm and everything has been test fit the arm assembly
is glued and wedged into the seat.
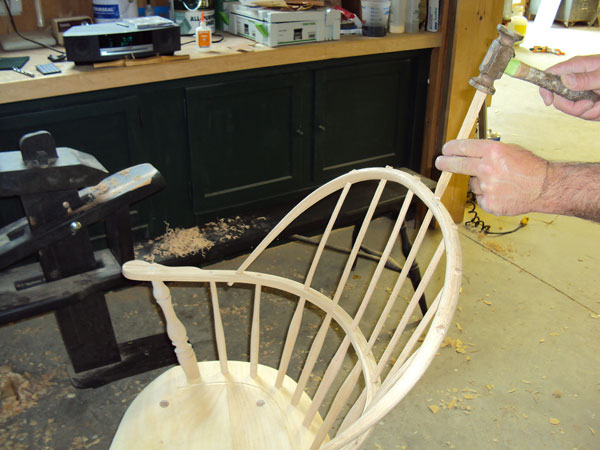
STEP 6
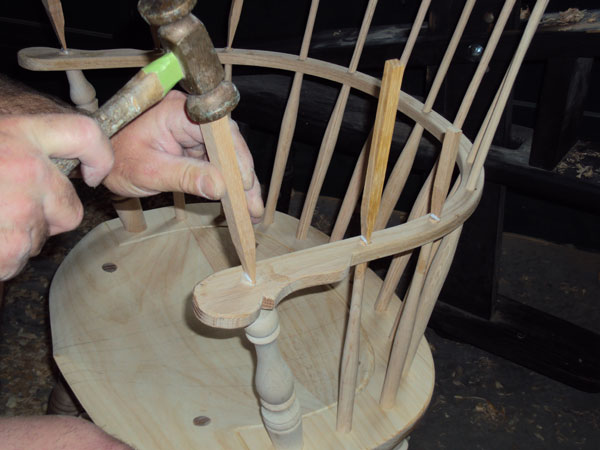
Last is the bow. After the holes are drilled, the bow is test fit, then glued and wedged. A
final sand and paint are the only processes remaining before you have a finished chair.
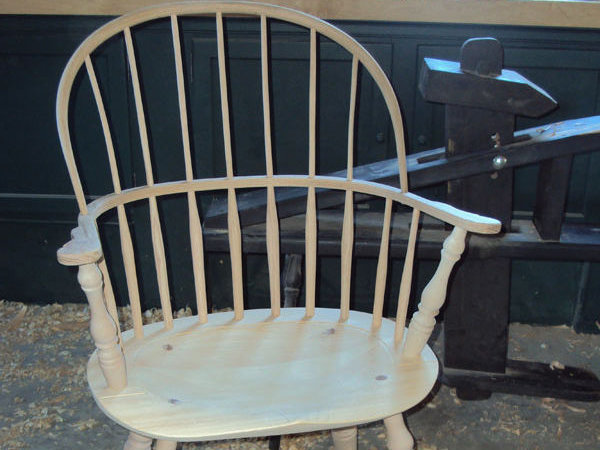
STEP 7
The paint is applied to the finished chair.


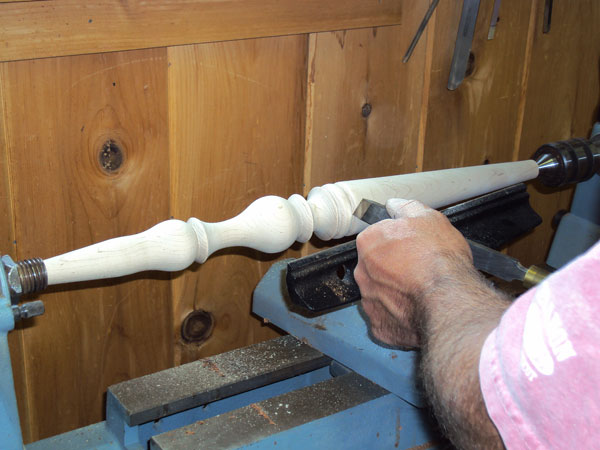
Turnings
You will find a wide variety of turnings for sale to make Windsor
chairs. There are several different styles of legs, stretchers back
posts and spindles to purchase. Please take a minute to browses to
see if there are any you like. If interested in purchasing, please
call or email me a list of the part numbers for my review. The turnings
can be purchased several different ways. Please go to the price list
to see what's right for you. Custom turnings are available upon request.
All turnings come in maple and some are available in cherry and oak in
limited quantities.
Turnings Price List

Legs

Stumps

Side Stretchers

Center Stretchers

Back Posts

Spindles
Other Products

Work Bench

Reamer

Shave Horse